Posts Tagged ‘Focus Stacking

03
Jun
24

Bluebells & Flora at Bowman’s Hill

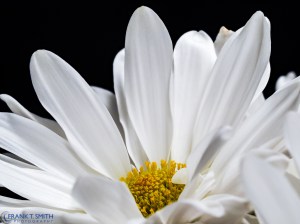
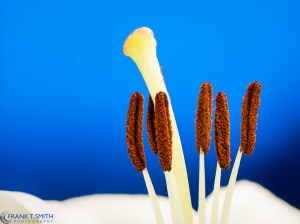
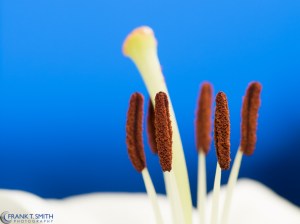
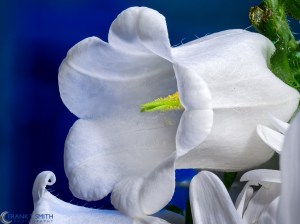
Join me on a captivating journey to Bowman’s Hill Wildflower Preserve in New Hope, PA, where I explore the beauty of early spring flora through the lens of macro photography. In this video, I’ll walk you through my process of setting up camera shots, focusing on key elements such as composition, complementary colors, depth of field, and proper exposure. I’ll also delve into computational photography techniques and share general camera setup tips to help you capture stunning images.

Check out the breathtaking bluebells and other vibrant flowers as they bloom, showcasing the incredible detail and beauty of nature just coming to life. Whether you’re a photography enthusiast or simply love the wonders of springtime, this video offers valuable insights and inspiration for your own photographic adventures. Don’t miss out on the spectacular visuals and in-depth tips that will elevate your macro photography skills!

Please check out my video from this beautiful place: https://youtu.be/RvWu-d_v7-I

OM System, OM-1 MkII

M.Zuiko ED 90mm F3.5 Macro IS PRO

21
Jan
16

Focus Bracketing/Stacking

Olympus continues to be a pioneer with some of their latest technology advances. With their most recent firmware upgrades for the OM-D series cameras, we are now able to create images with a significantly greater depth of field through the use of Focus Bracketing & Focus Stacking. There is an option to create “in-camera” results (Focus Stacking) and also through the post processing processes (Focus Bracketing). Bracketing has always been an option in the past. However, it was extremely time consuming and required many manual focus steps, along with a lot of trial & error and guess work.

2015-12-30 18-46-40 (B,Radius25,Smoothing4)-Edit


The process I use to accomplish Bracketing and Stacking results are as follows:

  • “Focus Stacking” a.k.a. In-camera processing
    • Select the front most portion of your image that you want clear and use that as your focus point. Use a tripod or something to stabilize the camera.
    • Go to the camera “menu” and select “Shooting Menu 2” & “Bracketing”. Click “On” and proceed to “Focus BKT”. Now select “Focus Stacking” & select”On”.
    • Next select the “Set focus differential”. You have a step range from 1 (Narrow) to 10 (Wide). A focus step refers to the amount of focus movement where 1 is the smallest setting. When shooting at the widest aperture value, I would recommend using smaller focus step 1 or 2. Your selection will depend on your subject matter, aperture setting, distance, etc.
    • After you have these settings in place make sure you hit OK all the way through.
    • At this point you are ready to hit the shutter release (Tip: I would recommend using a cable release so as to not bump the camera).
    • The camera will process a JPEG image and at this point you can now see the preview.

Below is an example of an in-camera Focus Stacked image using this process along side of a single non stacked image. The differential is quite amazing. Click on the images to see the full view.

Focus Stacked

Focus Stacked

Non-Focus Stacked

Non-Focus Stacked


  • “Focus Bracketing” Requires 3rd party post-processing software
    • Select the front most portion of your image that you want clear and use that as your focus point. Use a tripod or something to stabilize the camera.
    • Go to the camera “menu” and select “Shooting Menu 2” & “Bracketing”. Click “On” and proceed to “Focus BKT”. Now select “Focus Stacking Off”
    • Select “Set number of shots”. You can select up to 999 shots. I have found that anything between 10 and 60 shots work well.
    • Next select the “Set focus differential”. You have a step range from 1 (Narrow) to 10 (Wide). A focus step refers to the amount of focus movement where 1 is the smallest setting. When shooting at the widest aperture value, I would recommend using smaller focus step 1 or 2. Your selection will depend on your subject matter, aperture setting, distance, etc.
    • After you have these settings in place make sure you hit OK all the way through.
    • At this point you are ready to hit the shutter release (Tip: I would recommend using a cable release so as to not bump the camera).
    • Now you have to take the images into a program like Photoshop or HeliconFocus (I have had good success with HeliconFocus). After you merge the images, you can perform your normal edits.

Below are two series of images where I used this process. The first image is the processed bracketed image and the second one is a single non-bracketed image.

Bracketed

Bracketed

Non-bracketed

Non-bracketed


Bracketed

Bracketed

Non-bracketed

Non-bracketed


In all cases it will require experimenting with various settings. All of the images were shot with the Olympus OM-D E-M1 and the 60mm f2.8 macro lens.


Follow Frank's Photography Blog on WordPress.com

Enter your email address to follow this blog and receive notifications of new posts by email.

Join 2,250 other subscribers
December 2025
M T W T F S S
1234567
891011121314
15161718192021
22232425262728
293031  

My Blog

Thank you for viewing my blog.