This video attempts to capture some of the remaining summer colors combined with the start of autumn colors. I’ll take a look at composition options and I’ll share some of my camera settings. Enjoy the hike!
Here is the YouTube link

This video attempts to capture some of the remaining summer colors combined with the start of autumn colors. I’ll take a look at composition options and I’ll share some of my camera settings. Enjoy the hike!
Here is the YouTube link
This is a quick video of my hike into Jim Thorpe, PA on the D&L Trail. Check out the many photographic opportunities along the way, including some of my camera settings. I hope you enjoy the trip and please consider subscribing. For better quality here is a YouTube link.


Take a look at my discoveries during my photographic adventure to this amazing state park. Explore, Capture and Create!
Here is the Link to the video

Please check out the video and consider subscribing. This is an explorational & educational hike to Pennsylvania’s Ricketts Glen State Park with a focus on the waterfalls.
Get Olympus
For better quality here is a YouTube link: https://youtu.be/pFkGcIi5giw
#olympus #getolympus #travel #travelphotography
#travelphotographer #landscape #landscapephotography #mzuiko #omd#omdem1markIII #OMDEM1Mk3 #photo #photograph #franksmithphotos#olympusvisionary #getolympus #franksmithphotosdotcom #franktsmith#franktaylorsmith #franktsmithdotcom #franksmithphotography#OlympusOMD #breakfree #BreakFreeWithOlympus #CloseToHome#HomeWithOlympus #Hike
By Frank T. Smith, Olympus Visionary
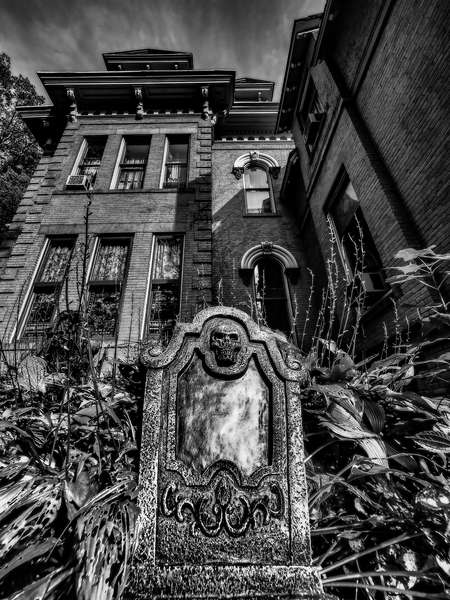
Fall is one of my favorite seasons. Photographing in the fall has so much potential with the changing seasons as well as with the holidays. Every year the photographic opportunities increase not only by the number of organizations and families that go all out decorating, but also by the ability to combine the in-camera features of the Olympus system with a few post-processing tricks to create haunting moods in your Halloween images.
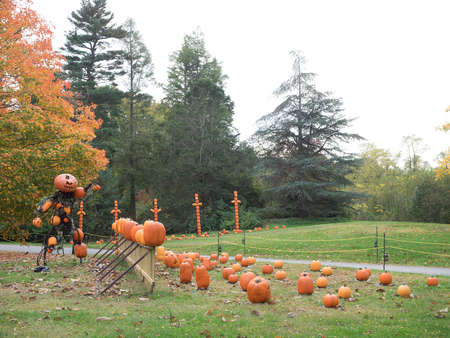
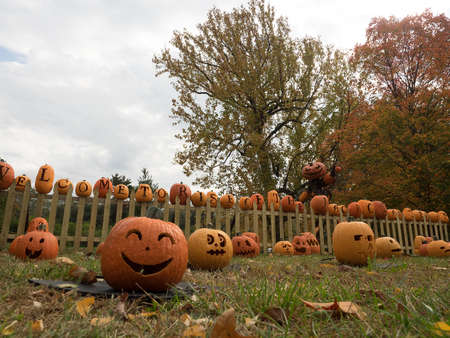
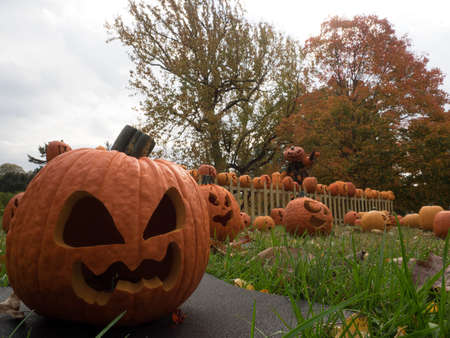
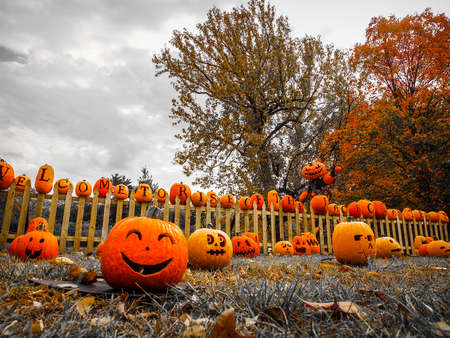
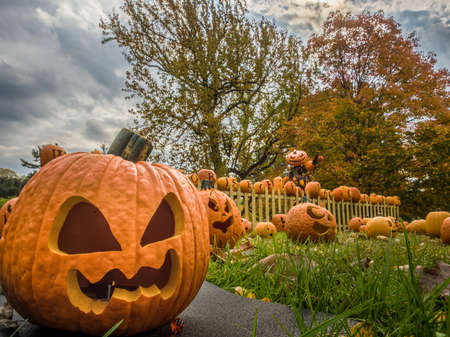
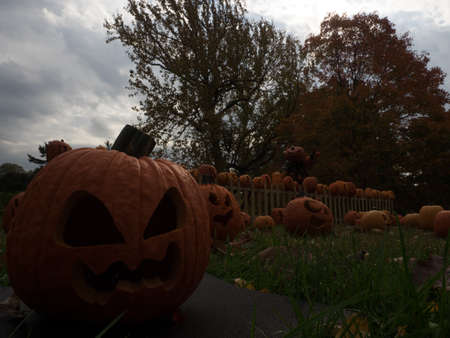
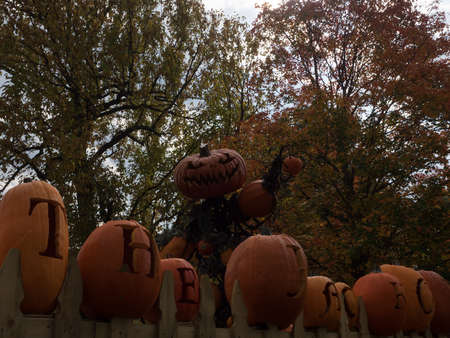
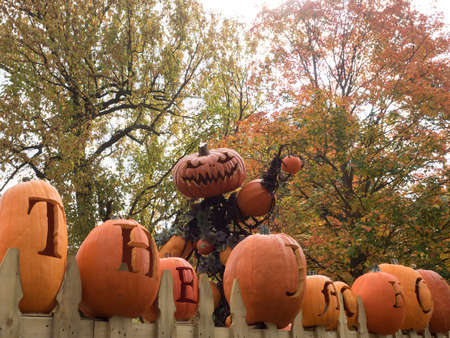
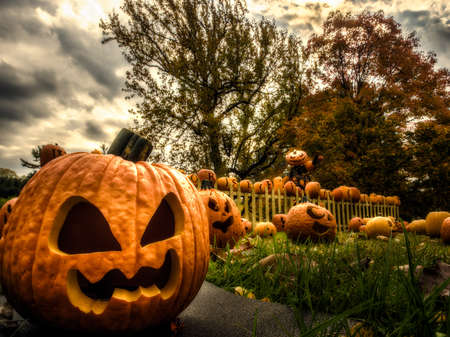
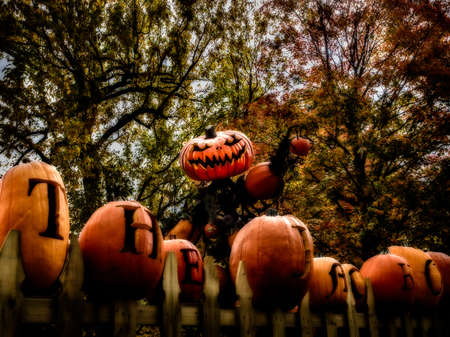
Who doesn’t love a pumpkin patch? The season is brief and the dramatic tones created by nature are perfect for setting up the “great pumpkin shoot.”

The Planning
Since Halloween displays are only up for a limited amount of time, it’s important to plan ahead. Strategically plan your locations or even do a site visit to scope out the best time to avoid overcrowding. Plan out your shots knowing that you will also need to be fully adaptable when you are actually shooting. This may require extra tools like step ladders or potentially even lighting to capture the shots.
On my site visit, I’ll typically utilize many of the in-camera filters to plan out my shoot. The time of day is also a critical factor (as is the weather) to capture the best imagery.
The Shot
Once I am on location my goal is to set up the shot, take a few test images and determine the best lighting; location and camera settings. I typically will have my tripod and if needed, I will use a step ladder (which means handheld shots). You need to have strong foreground for the image, and you can look to create “moods” through shadows and post processing.
Composition
Composition is always foremost. For my pumpkin shoot, I typically get low to the ground. Before deciding on my positioning, however, I move around and check out the potential image from various angles. It’s important to also make sure there are no random objects in the image that would otherwise detract from my goal.
I always look for a primary subject which can be either in the foreground, mid-ground or background to focus on for the shot.
Settings
A few of the in-camera filters such as dramatic tone; selective color and focus stacking work great for capturing the “dramatic” or “spooky” elements of Halloween.
I also like to use High Dynamic Range (HDR) shots when there are extreme contrasts. HDR requires you to take a series of shots at different exposures. You can either allow the camera to process the images or you can process them in post processing.


After the Shot
I will typically post process these types of image to create the final mood. I work with the RAW files from my shoot and will look at both the RAW shot as well as the in-camera JPEGs. I’ll also bring the RAW files into Photoshop to bring out the light and the dramatic tones of the photo in order to achieve the desired effect.
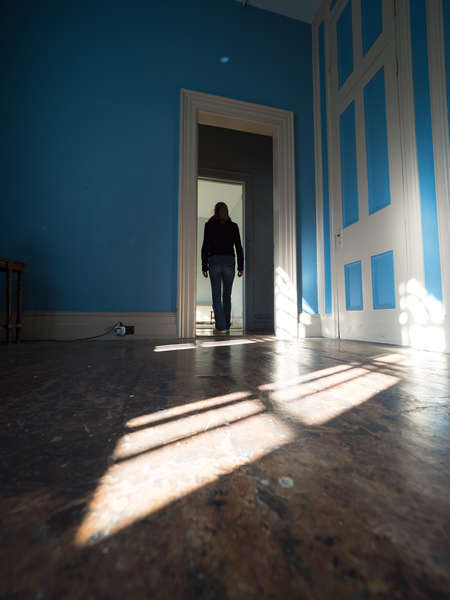
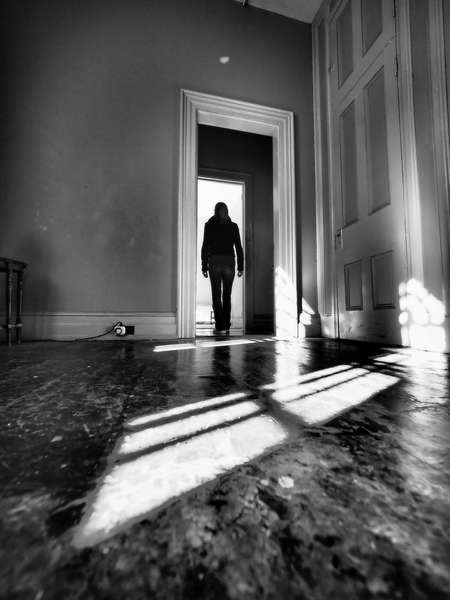
Find a strong foreground for the image, then look to create “moods” through shadows and post processing. Check out these examples below.
While creating this series of images, I first noticed the shadow on the floor. Taking note of the door opening, I decided to add an interesting element in the doorway – the vacuum. I then decided to look for a model to be in the doorway, and to focus on the shadows. Light is very important and any opportunities for shadows can really add to the photo.
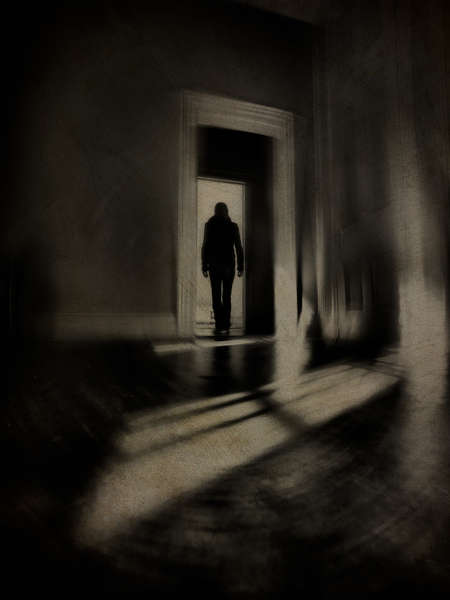

To create the mood, I used the in-camera dramatic black & white setting and the monochromatic setting in post processing. Finally, I created a swirling vignette to eliminate any distractions and to enhance the creepy effect.
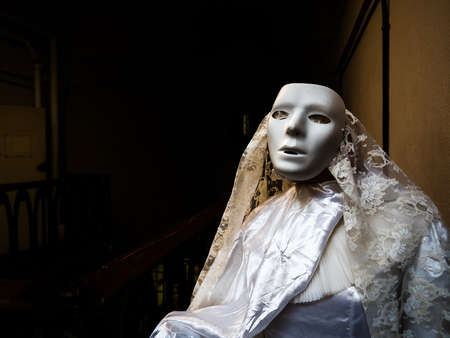
I found this eerie subject in good light with a dark background. In post processing I slightly de-saturated the image and added an exaggerated amount of contrast. The resulting dark shadows enhanced the creepiness of the mood. (2 images with mask).
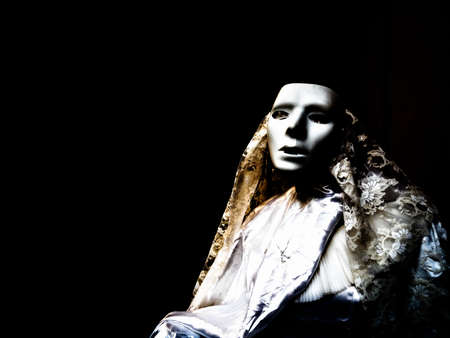
In order to create more power and add drama to this image, I positioned my camera very low to the ground and used a very wide angle. I also activated the in-camera black and white dramatic tone filter.
Web: franksmithphotos.com
Twitter: @Frank_T_Smith
Instagram: @Franktaylorsmith
Frank Smith is a self-taught photographer whose love for the craft goes back to a very early age. Decades later, Frank’s passion for photography has yet to fade as his skills continue to evolve. A native Northeasterner, Frank often focuses his lens on regional and local scenery including the Pocono Mountains and the historical sites of Bethlehem, Pennsylvania. His raw travel and philanthropic photojournalism covers global themes, shedding light on cultural issues such as regional corruption in areas including South Sudan and Haiti.
If you didn’t receive my newsletter for December here it is:
How Do You Spell Peace Valley
|
||||||||||||||||||||||||||||||||||||||
|
||||||||||||||||||||||||||||||||||||||
|
A couple of weeks ago I lead the annual “Behind the Curtain” photography workshop at the State Theatre in Easton, PA. This is always such a joy for me to photography this amazing gem. When you take the time to look at all of the incredible art in this place it’s almost overwhelming. I am breaking this post into two. This second post only includes black & white images and the previous one was all color. All images were handheld (this is the first time I didn’t use a tripod) using the Olympus OM-D E-M1 Mark II paired with the either the M.Zuiko ED 7-14mm f2.8 PRO, the ED 12-100mm f4.0 IS PRO or the ED 40-150mm f2.8 PRO.


I had the opportunity to present an architectural presentation and lead a photo walk for The CameraMall and Olympus. The events took place at the store and the photo walk took place on the University of Michigan campus. We spent time looking at abstract architectural components. All of the images were shot with the Olympus OM-D E-M1 Mark II and paired with the M.Zuiko ED 7-14mm f2.8 PRO lens. We had a partially overcast day, which lend itself perfectly to the in-camera Black & White Dramatic Tone mode.


I had the honer and pleasure to lead a photowalk at one of my favorite places in the Big Apple, the High Line. The photowalk was arranged by Bergen County Camera and sponsored by Olympus. The day was slightly overcast which, for me, means Black & White. All of the images were shot using the Olympus OM-D E-M1 MkII. A favorite style I like to employ on an overcast day is using “Dramatic Tone”. This is a mode option built into the camera (most of these shots used this mode).


 Bethlehem House Contemporary Art Gallery
